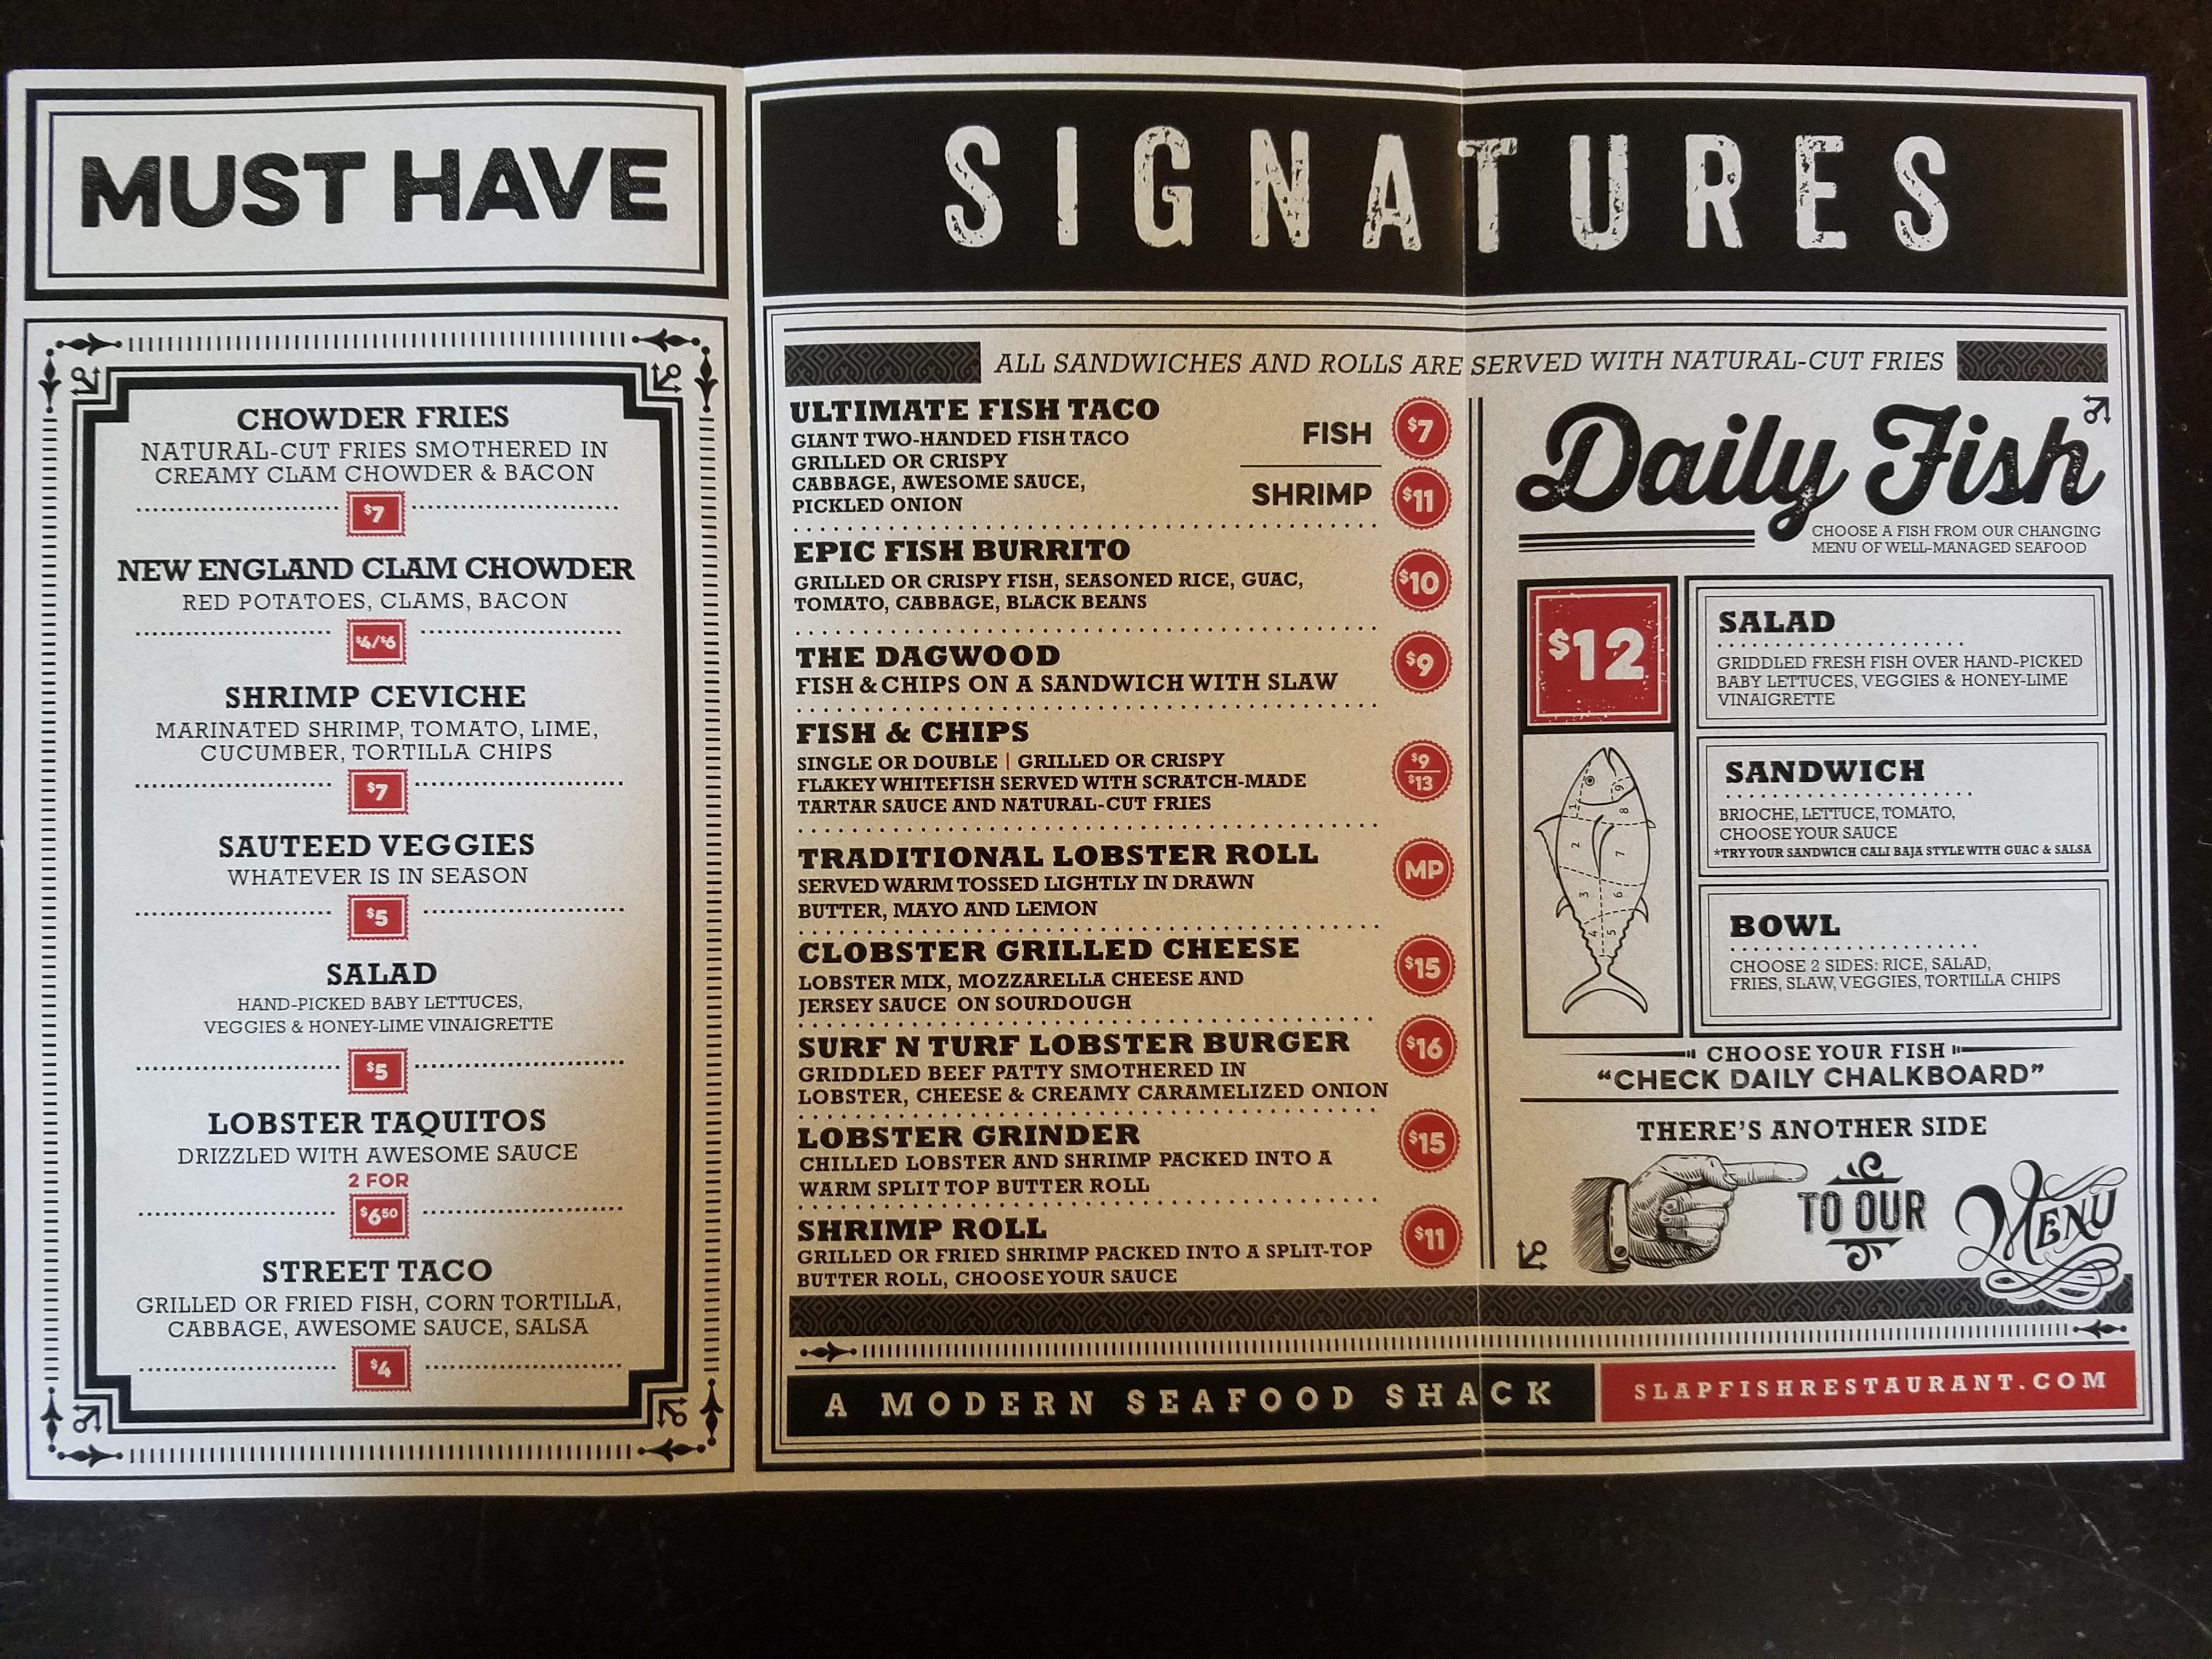
When we could not decide where to go for lunch with our oldest two we came upon Slapfish. After checking out there menu online we decided to give it a shot, I am happy to say, it was definitely worth it and a pleasant surprise. We selected 5 items to share between the 4 of us, Below we will review of each of them. If you are looking for good seafood and quick friendly service I would highly recommend Slapfish.
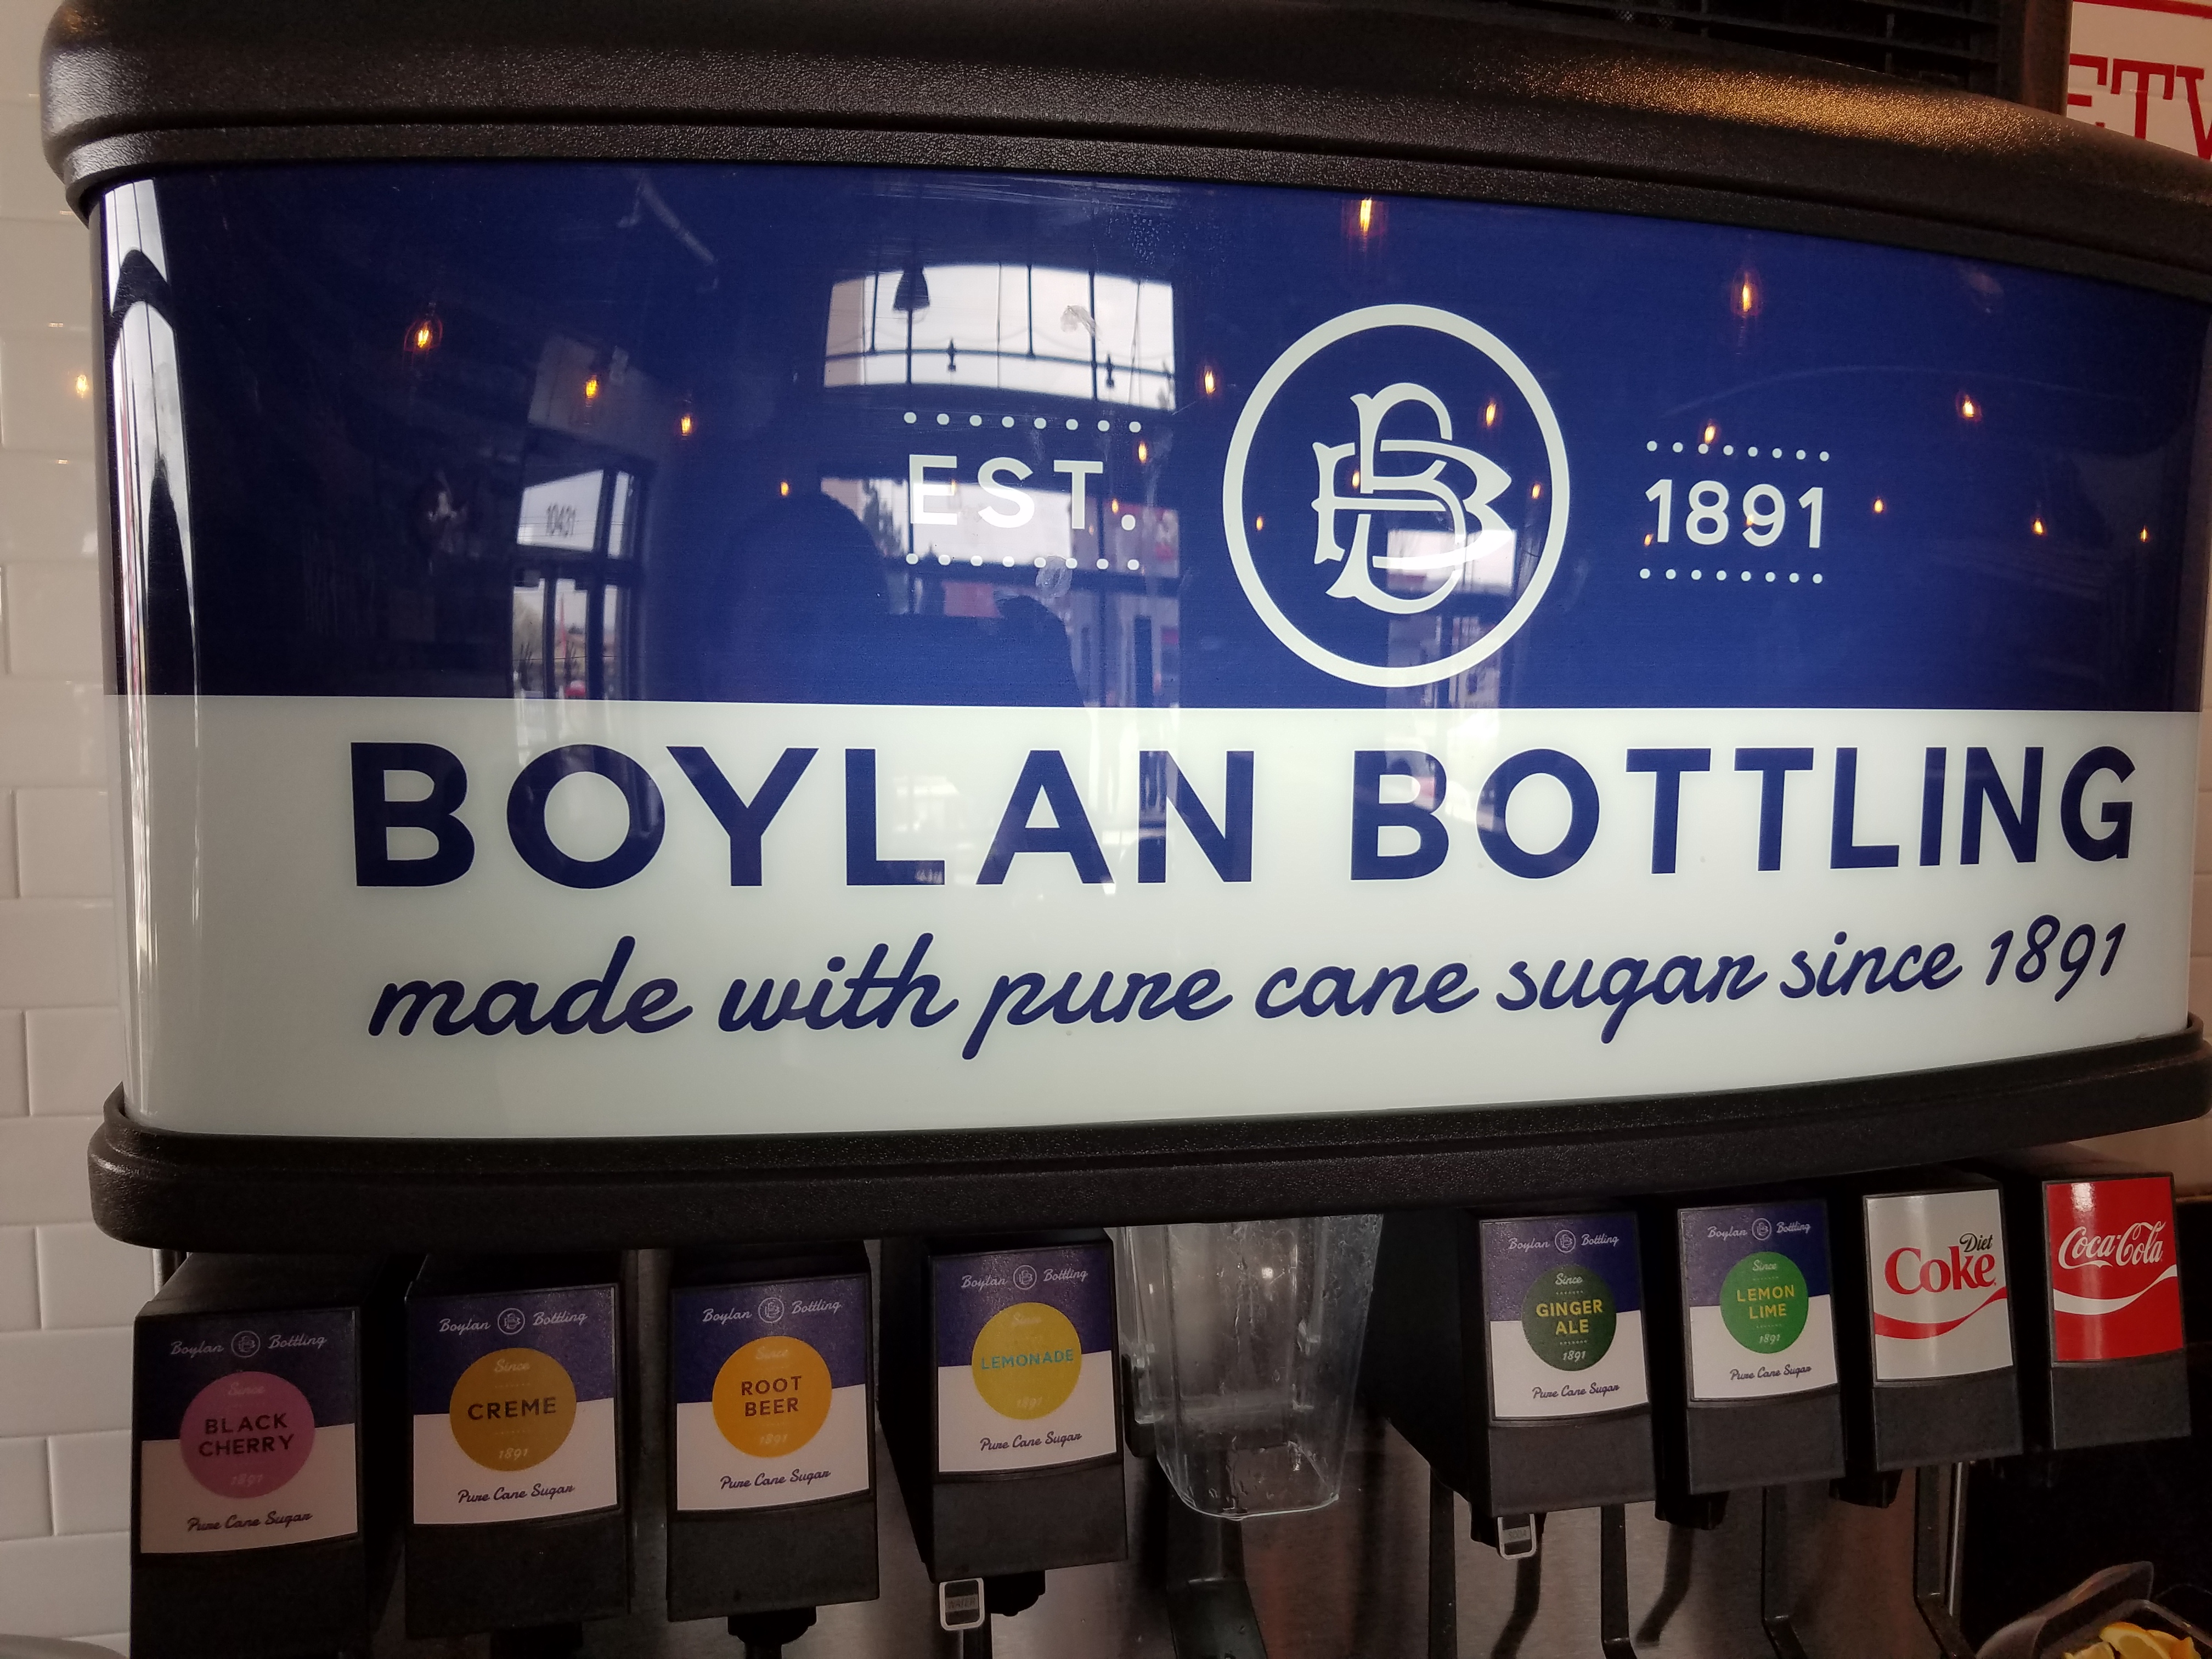
Serving Boylan Bottling
L – If I was not Diabetic I would have drunk the Black Cherry fountain soda, but instead I just put a splash in my Diet Coke. Yum!
J – Not being Diabetic (yet) I drank the black cherry. One of the best that I have had. I did try the others and this was my favorite.
S – After trying the other drinks, the Black Cherry was my absolute favorite! It had a very smooth flavor.
M – I also had a Diet Coke with with a splash of Black Cherry. It was the best drink I have ever had.
 L- The Fish and Chips were AMAZING and my favorite dish. It took me back to the Fish we had in England 17 years ago this week. The better was lite, crispy goodness and the fish was moist and flaky. The chips where not true English Chips but rather Fries dusted in Chili Powder. Their tartar sauce was fantastic. Their Fry Sauce or rather Awesome Sauce as they call it has a hint of Lime as well as Chili Powder to it.
J – The breading was very lite and crispy and the white fish was very delicate. Though this is a fried dish it was surprisingly lite and really good. This is where I tried the different hot sauces below. The french fries here are pretty standard, I think they put their development time into how to treat the seafood correctly, which is great.
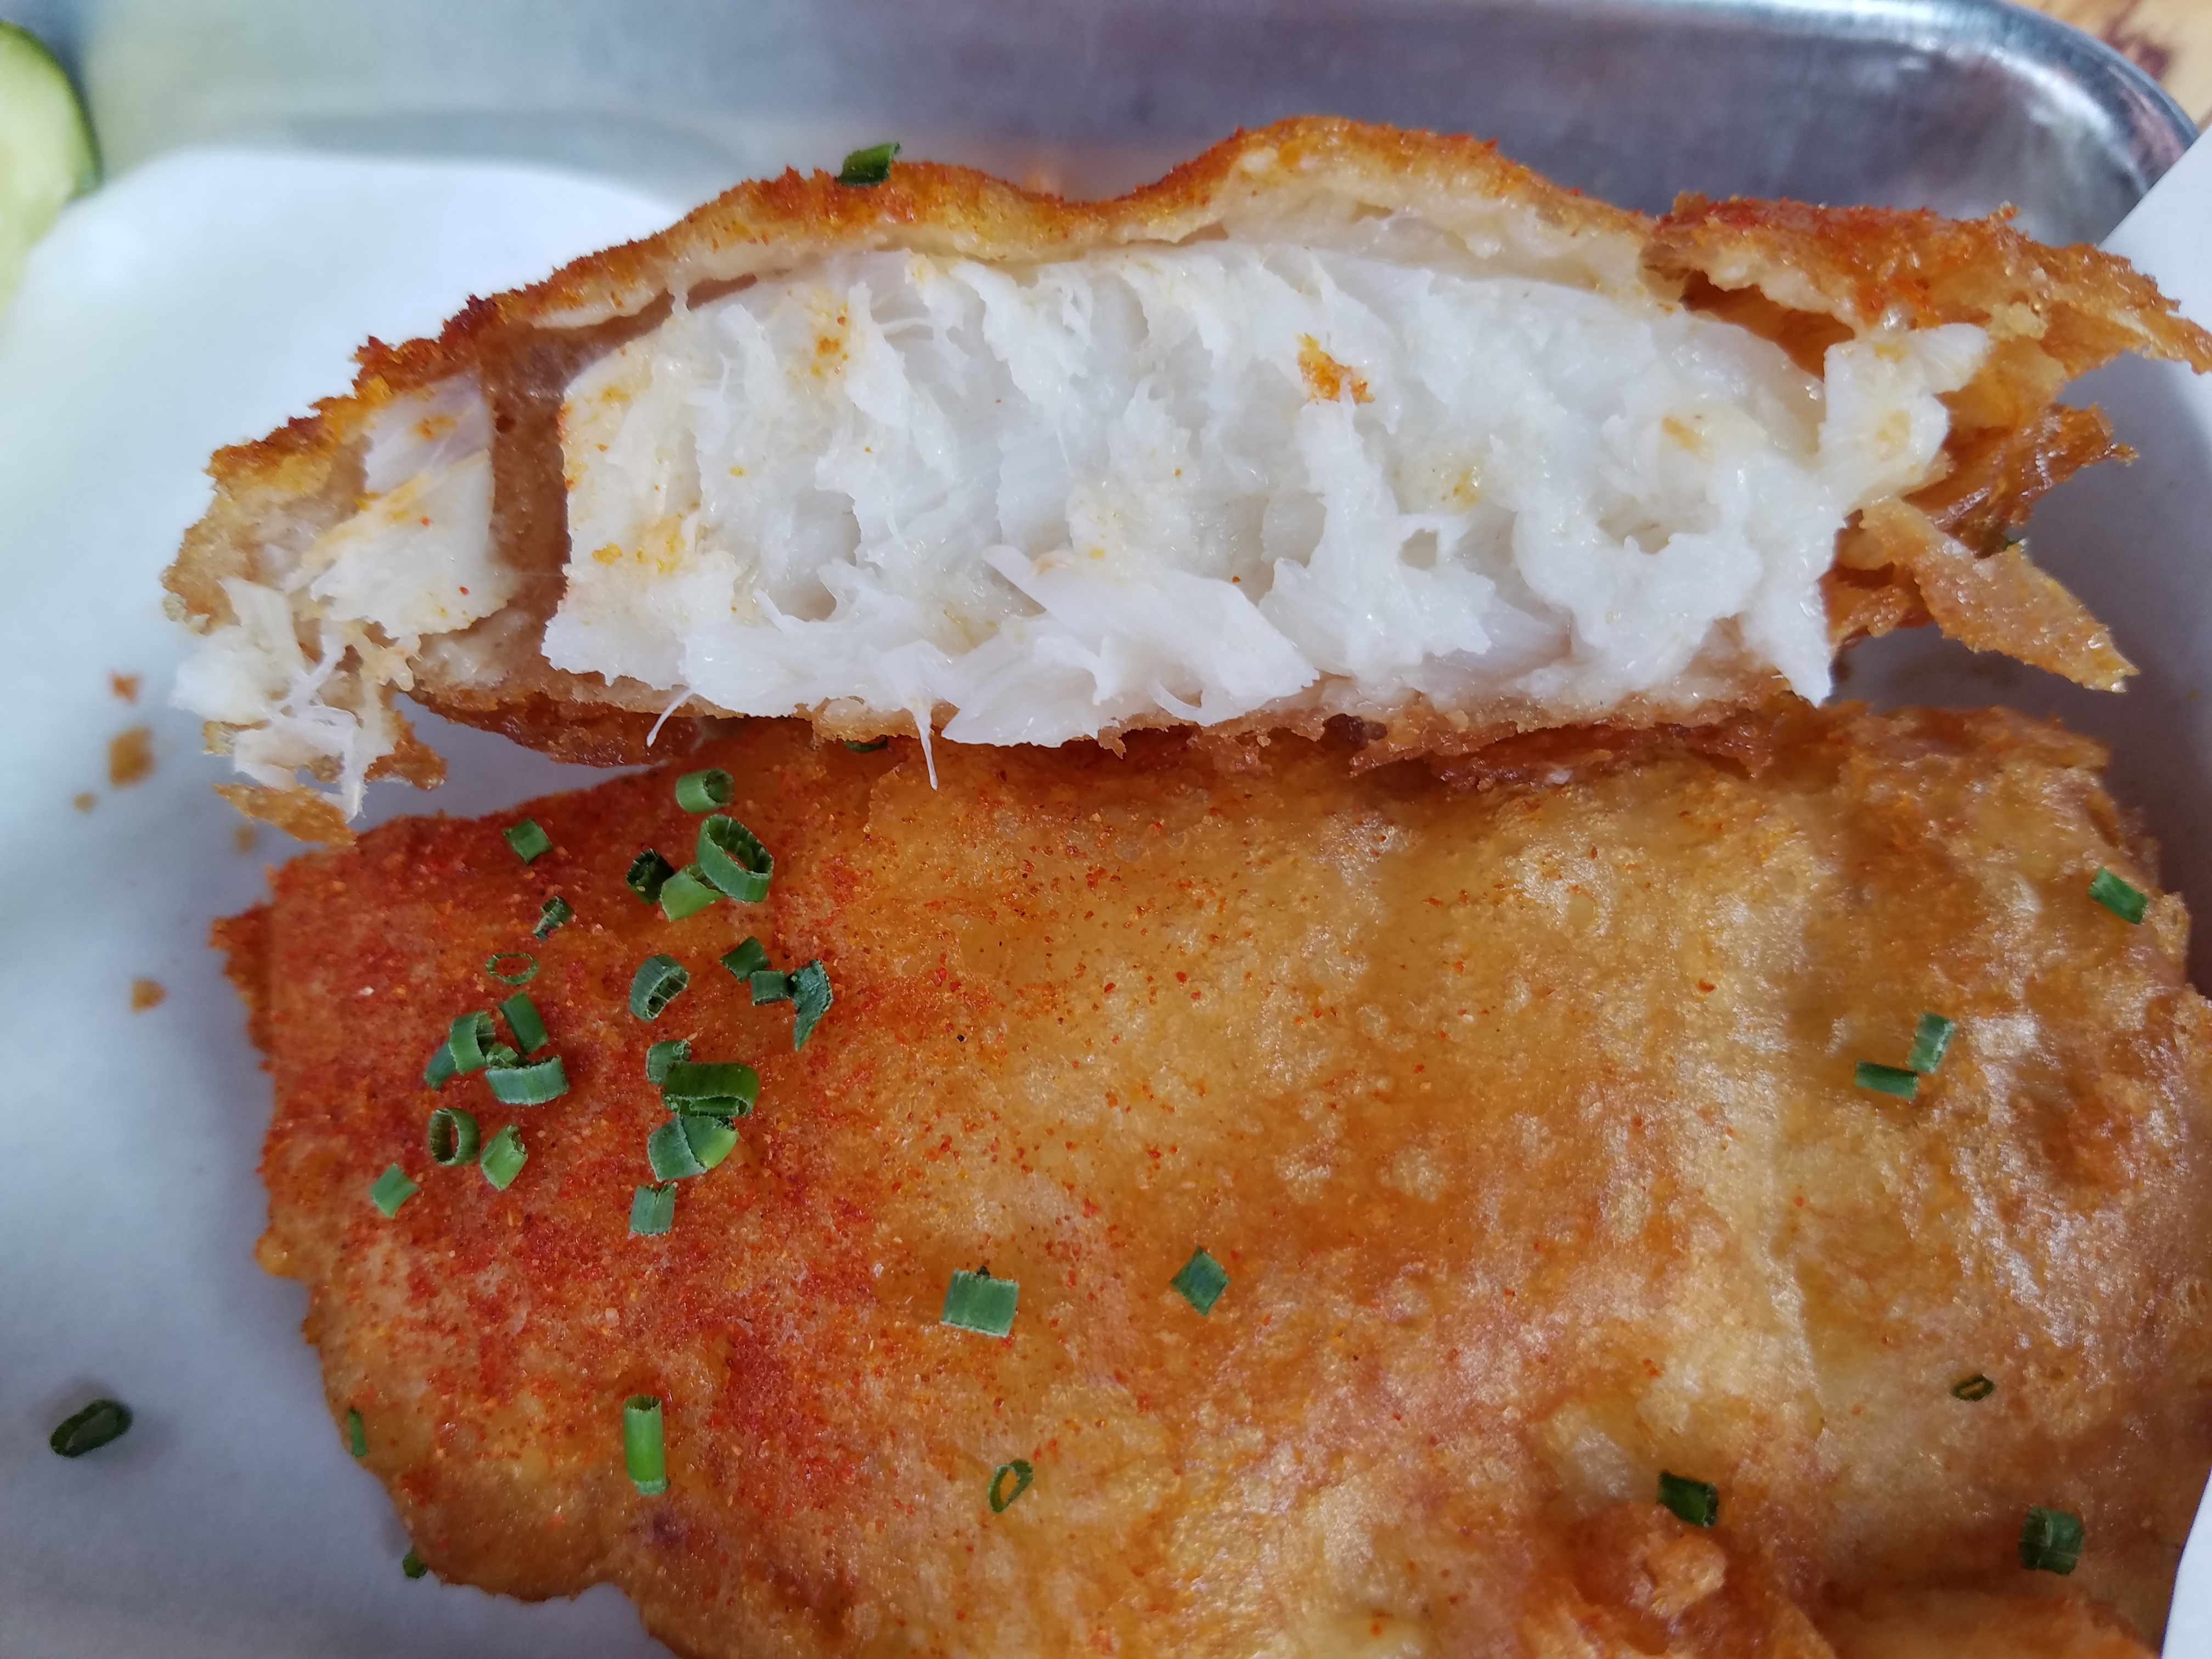 S – The fish and chips were so light and crispy, paired with the house tartar sauce, which had hints of cucumber, it tasted very clean, the flavors worked well together and stayed on my palate along with the other dishes, which all played nicely together. The fries and fish were dusted in chili pepper. I really enjoyed the fish and chips. The fries were some of my favorite fries I’ve ever had.
M – The Fish and Chips were Awesome, they were my second favorite dish. They were very delicate and even though it was fried it wasn’t very greasy.
 L – My second favorite dish was the Grilled Shrimp Salad. The salads come with your choice of grilled Fresh Fish/Seafood over amazing vegetables with a Honey-Lime Vinaigrette. Hidden under the shrimp was pickled onions that were delightful.
J – Really good mix of veggies and fruit (tomatoes) and a lot of shrimp for a salad. Just going to say this right now for a place that is supposedly fast food, they treated the seafood correctly. The shrimp in this salad was cooked perfectly and I could have eaten the entire thing.
S – I really like salad, and this one did not disappoint. There was a great mix of fresh produce (Lettuce, Raddishes, Cucumbers, Carrots, and Coleslaw) plus some pickled cabbage. The shrimp was seasoned and grilled to perfection. All of these, combined with the honey vinaigrette, led to a very pleasant trip to Flavor Town.
M – I honestly think that this was the best thing we got. It had some great Fruits and veggies, amazing grilled shrimp, and an awesome vinaigrette sauce. It was overall Amazing!
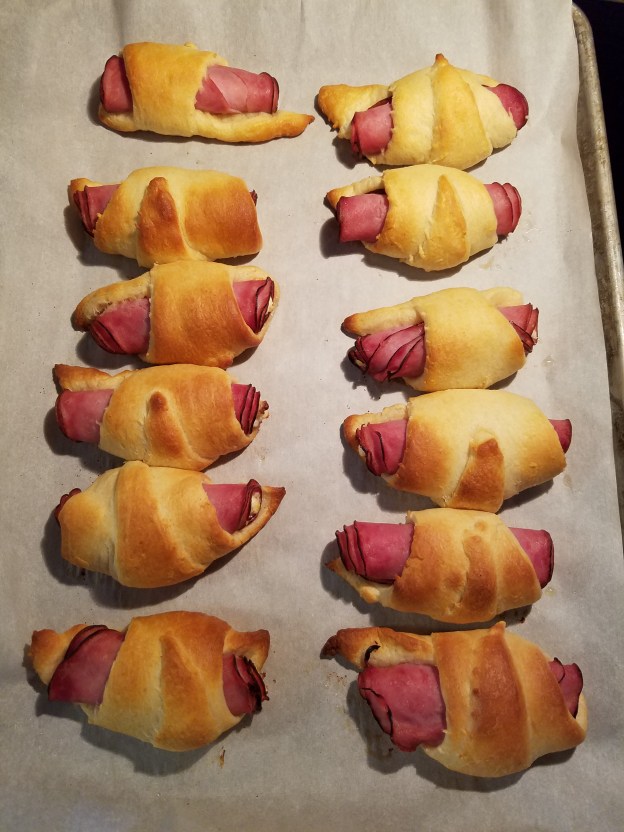
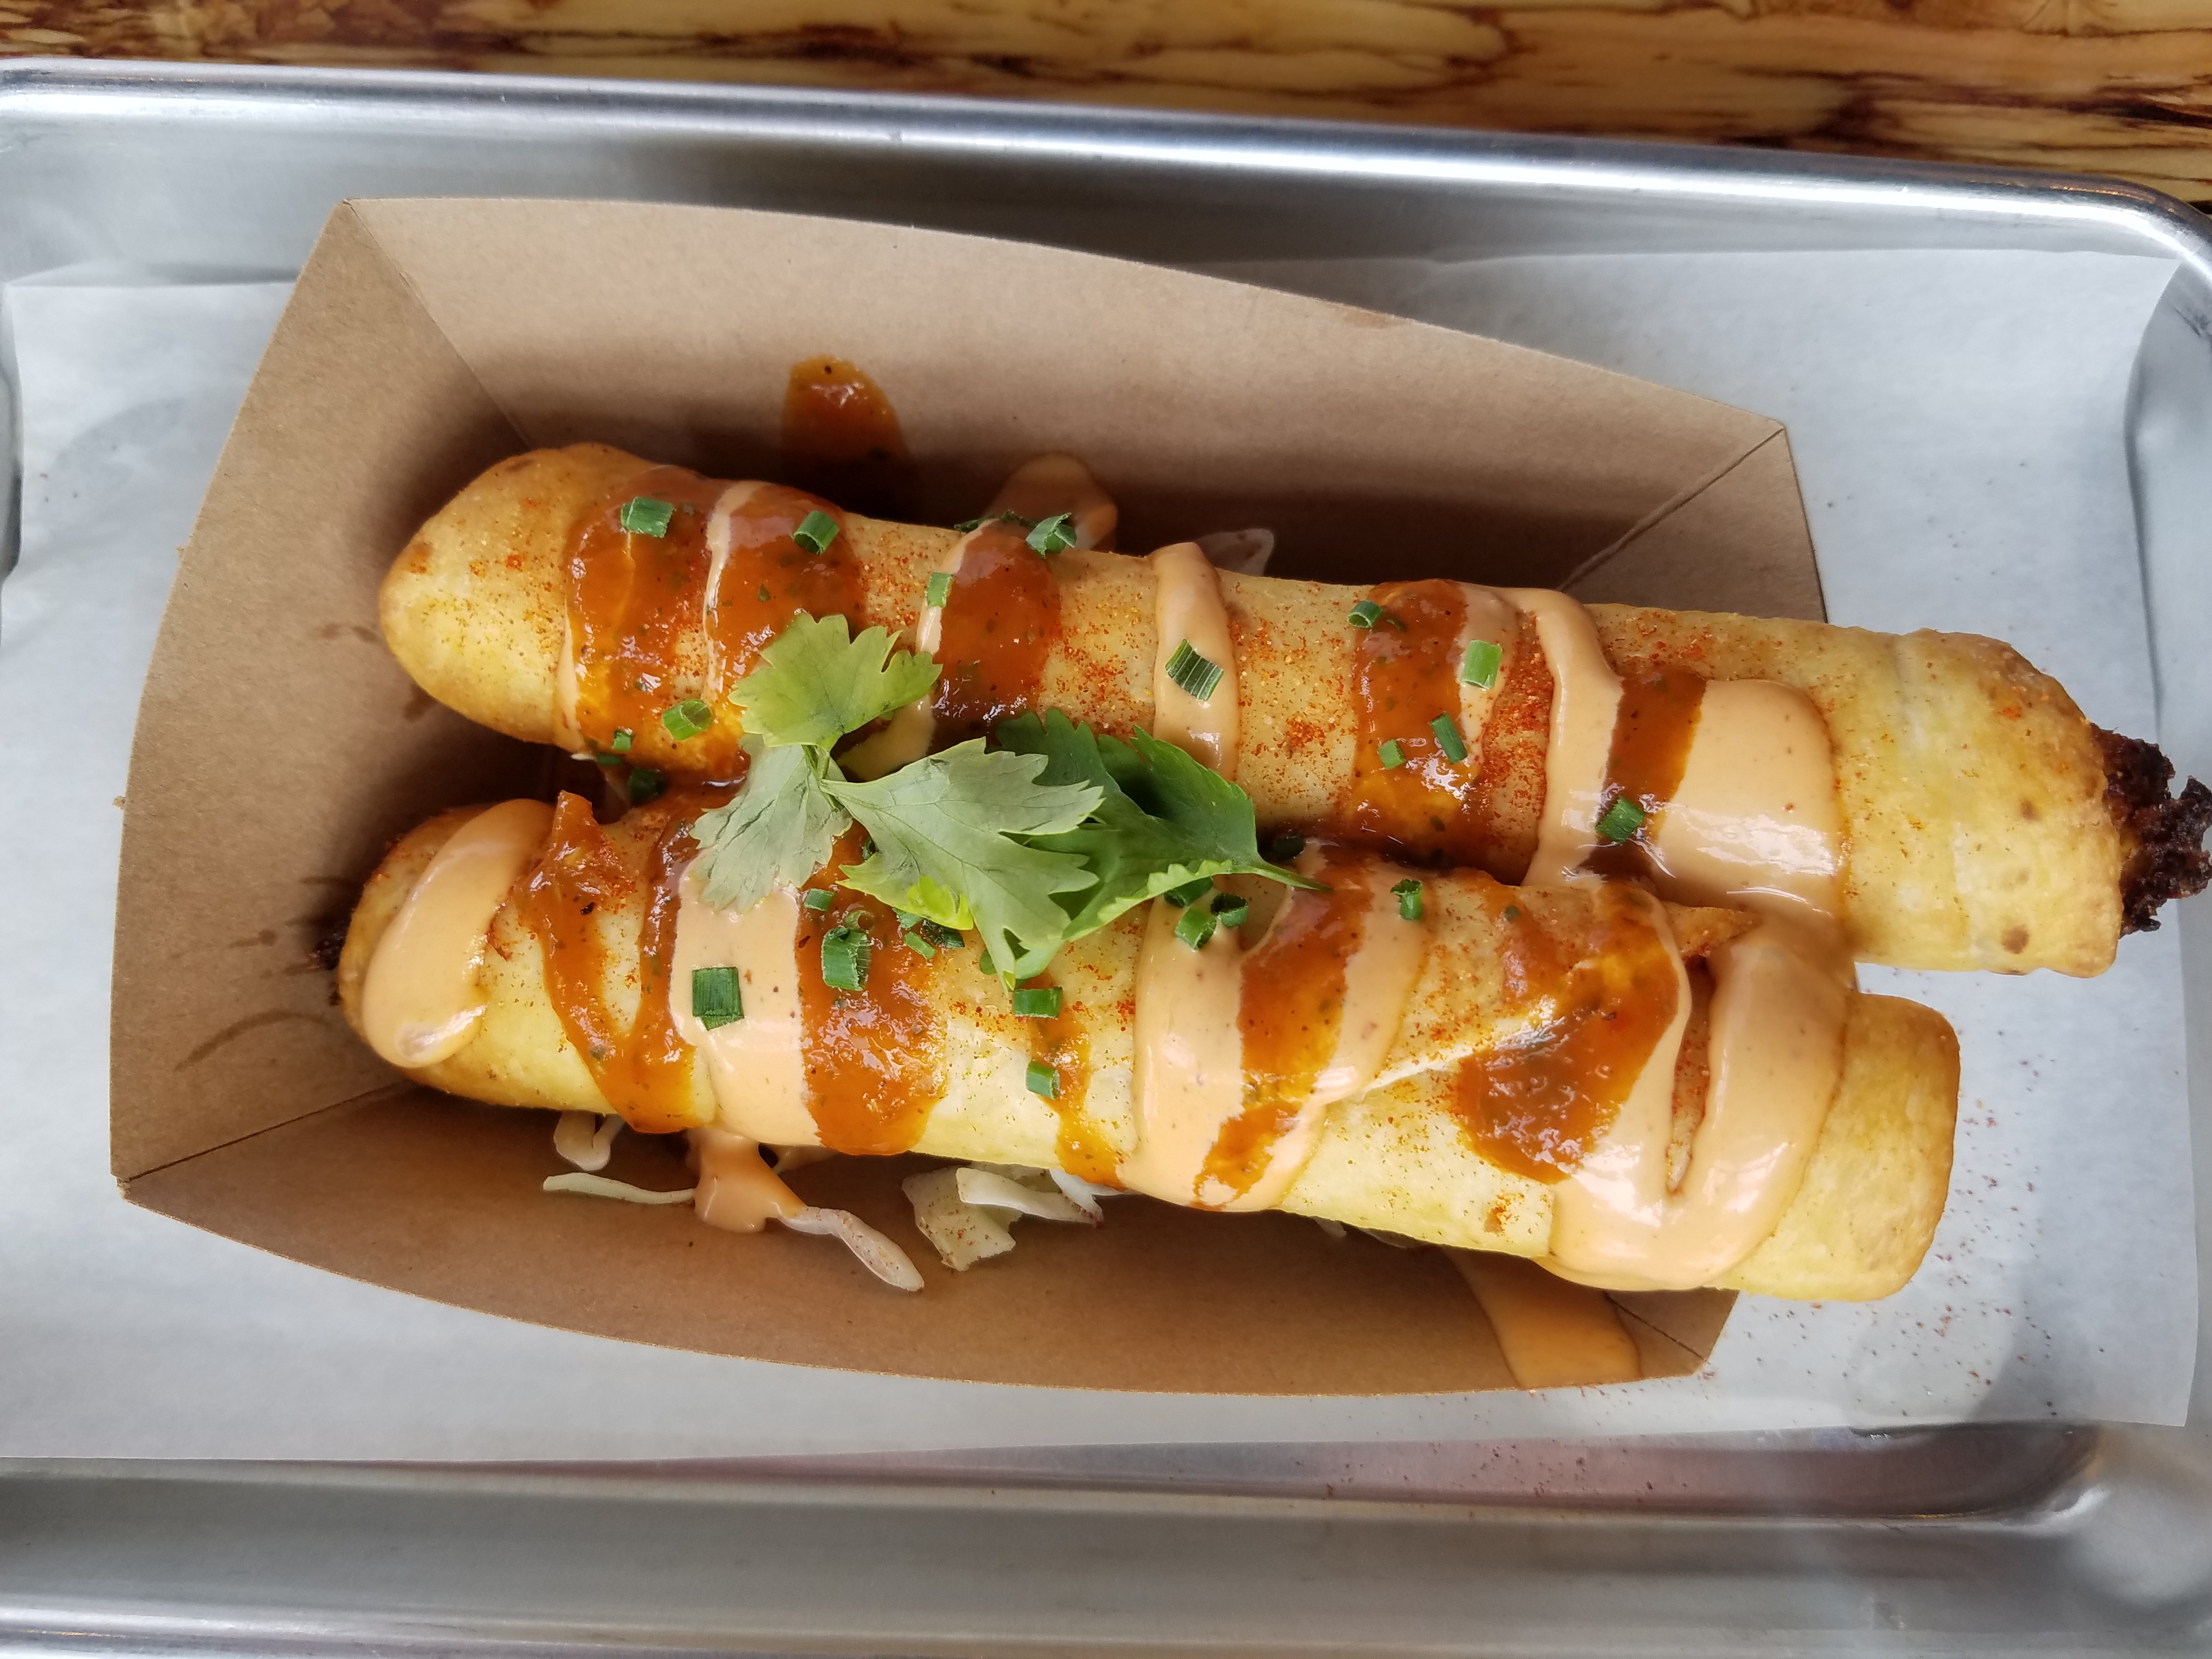 L- My third favorite was the Lobster Taquitos were tasty. Delicate Lobster in a crisp shell drizzled with Awesome Sauce.
J – I have eaten my fair share of taquitos, I have probably eaten yours too, but these were fantastic, though the end pieces in the pictures look a little dark the Lobster inside was so soft and full of flavor, add these to the salad above and you are in perfection.
S – Taquitos have never been my favorite, but these Lobster Taquitos, however, made me very happy. The sauces on top (Awesome sauce and what seemed to be a pleasantly spicy BBQ sauce) paired very nicely with the delicate lobster inside. The taquito’s shell was pleasantly crispy.
M – The Lobster Taquitos honestly my least favorite. I felt like the Sriracha was too over powering.
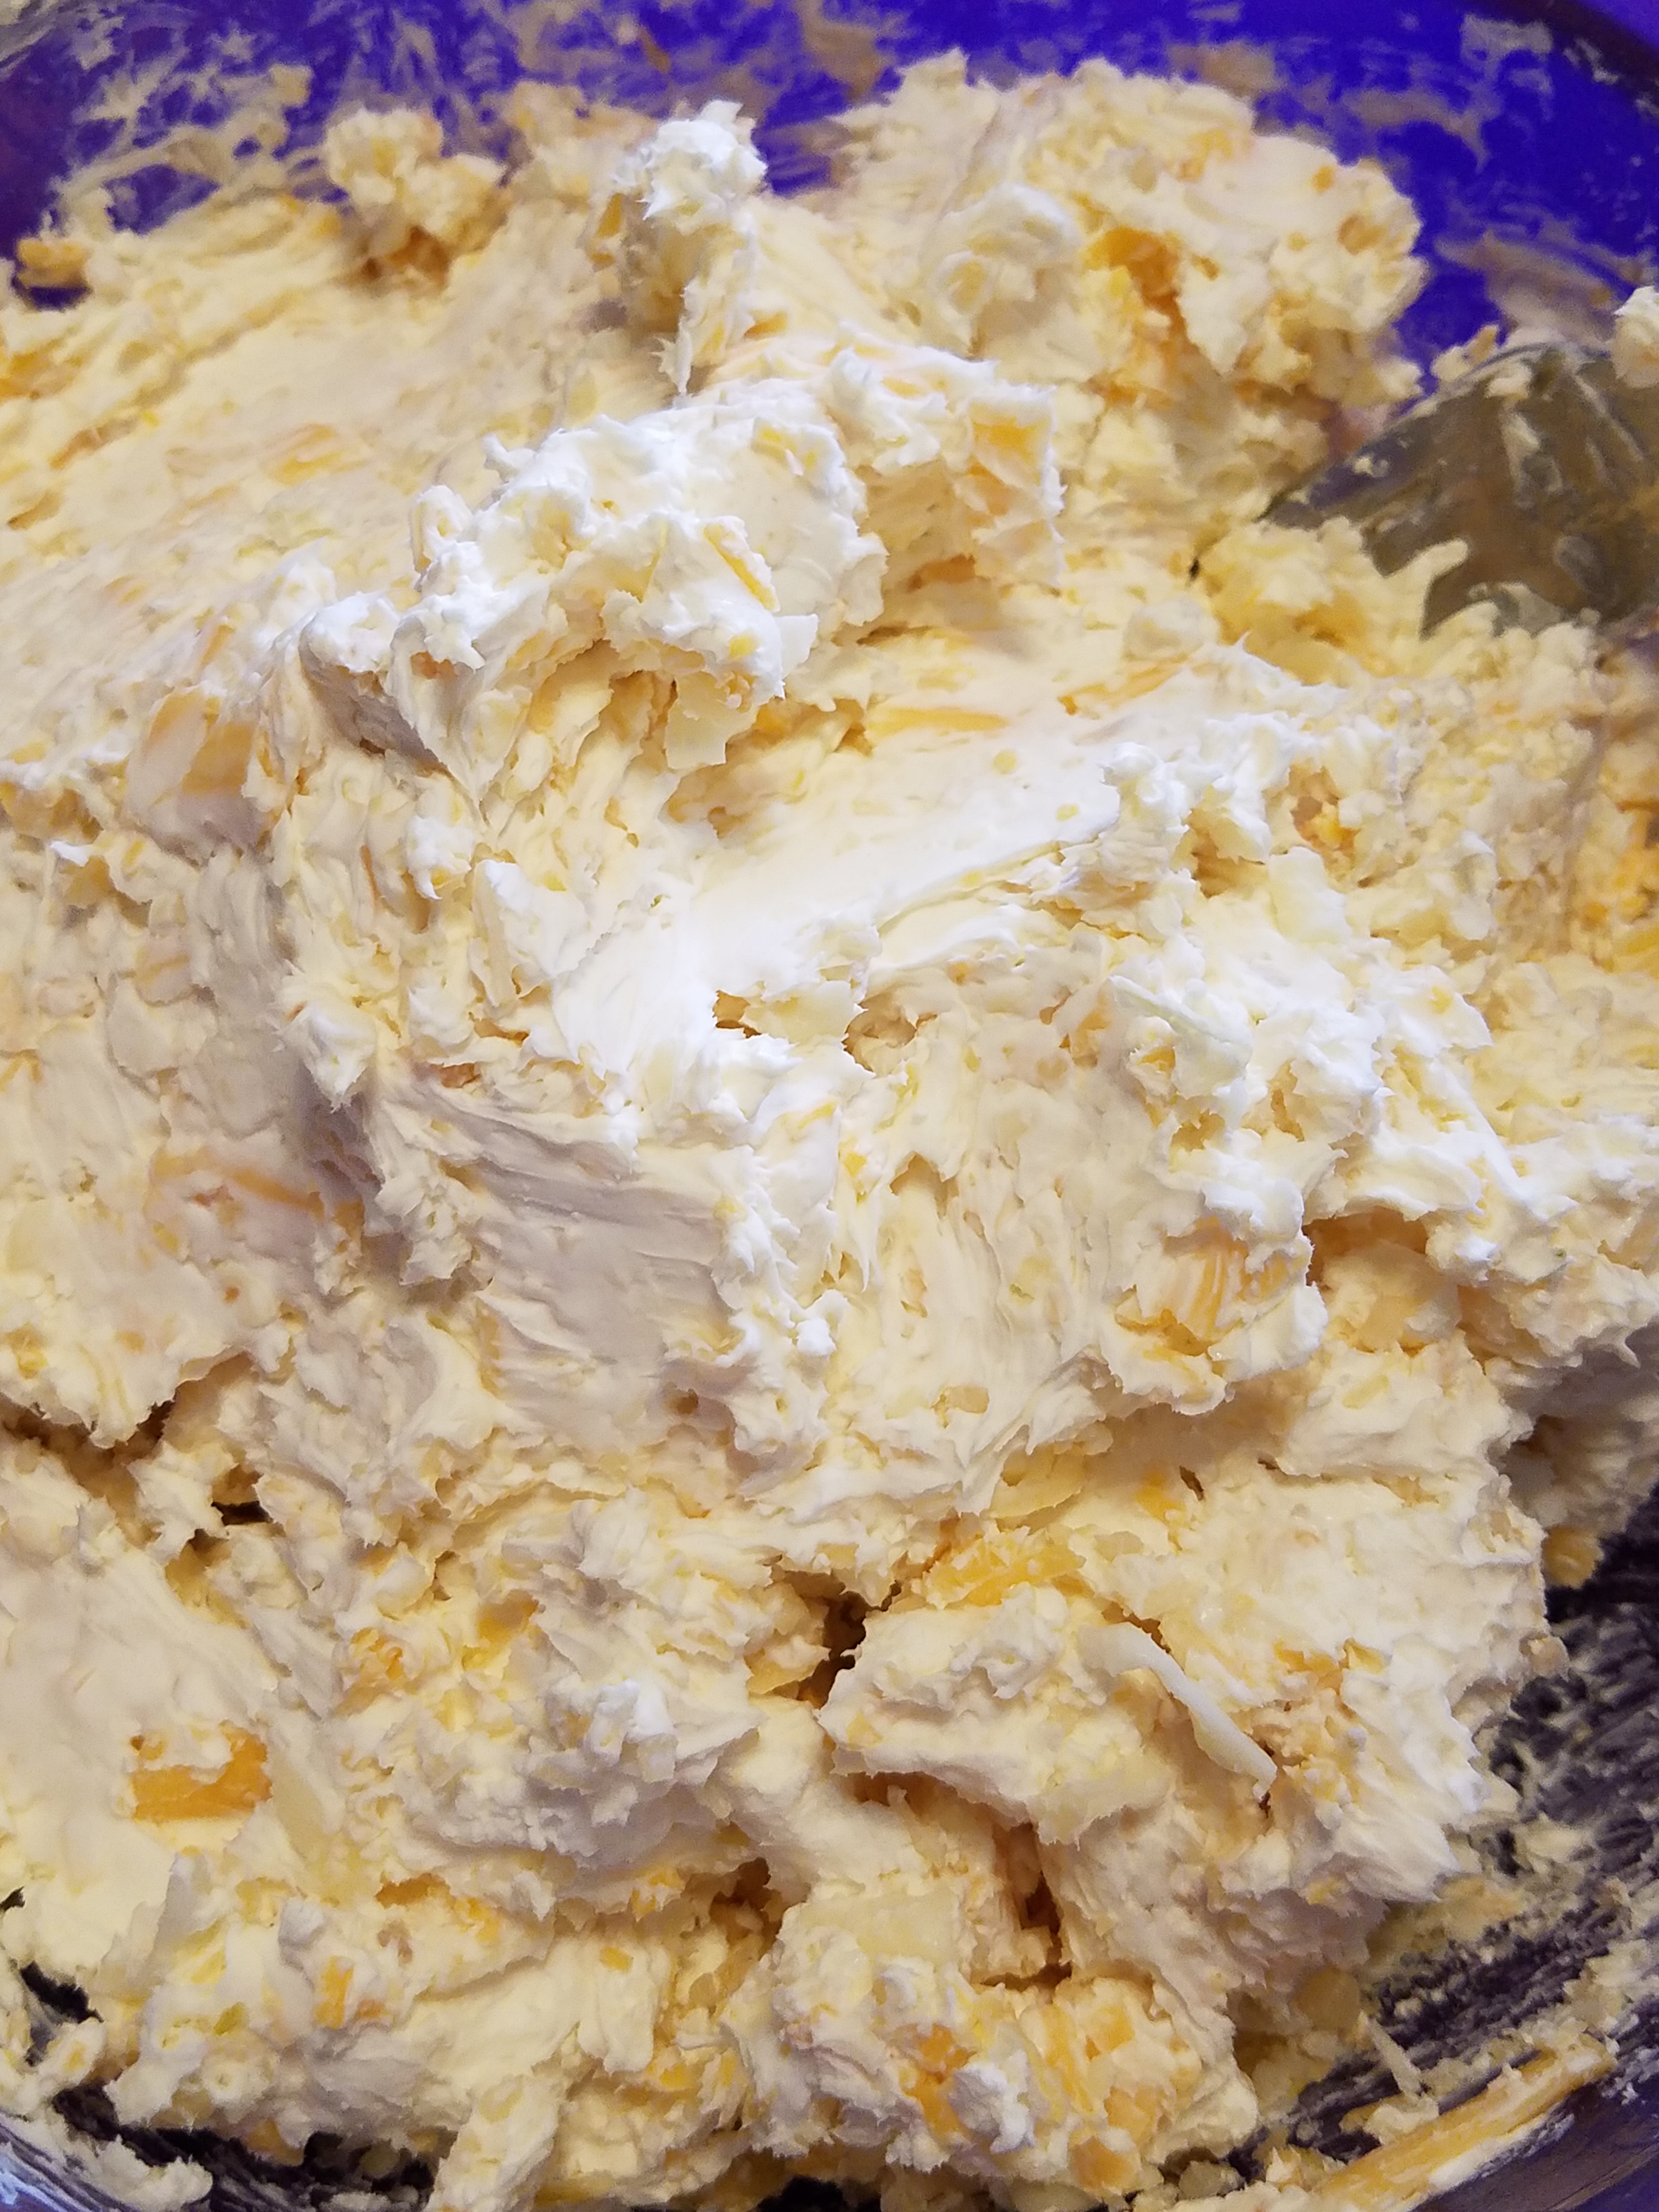
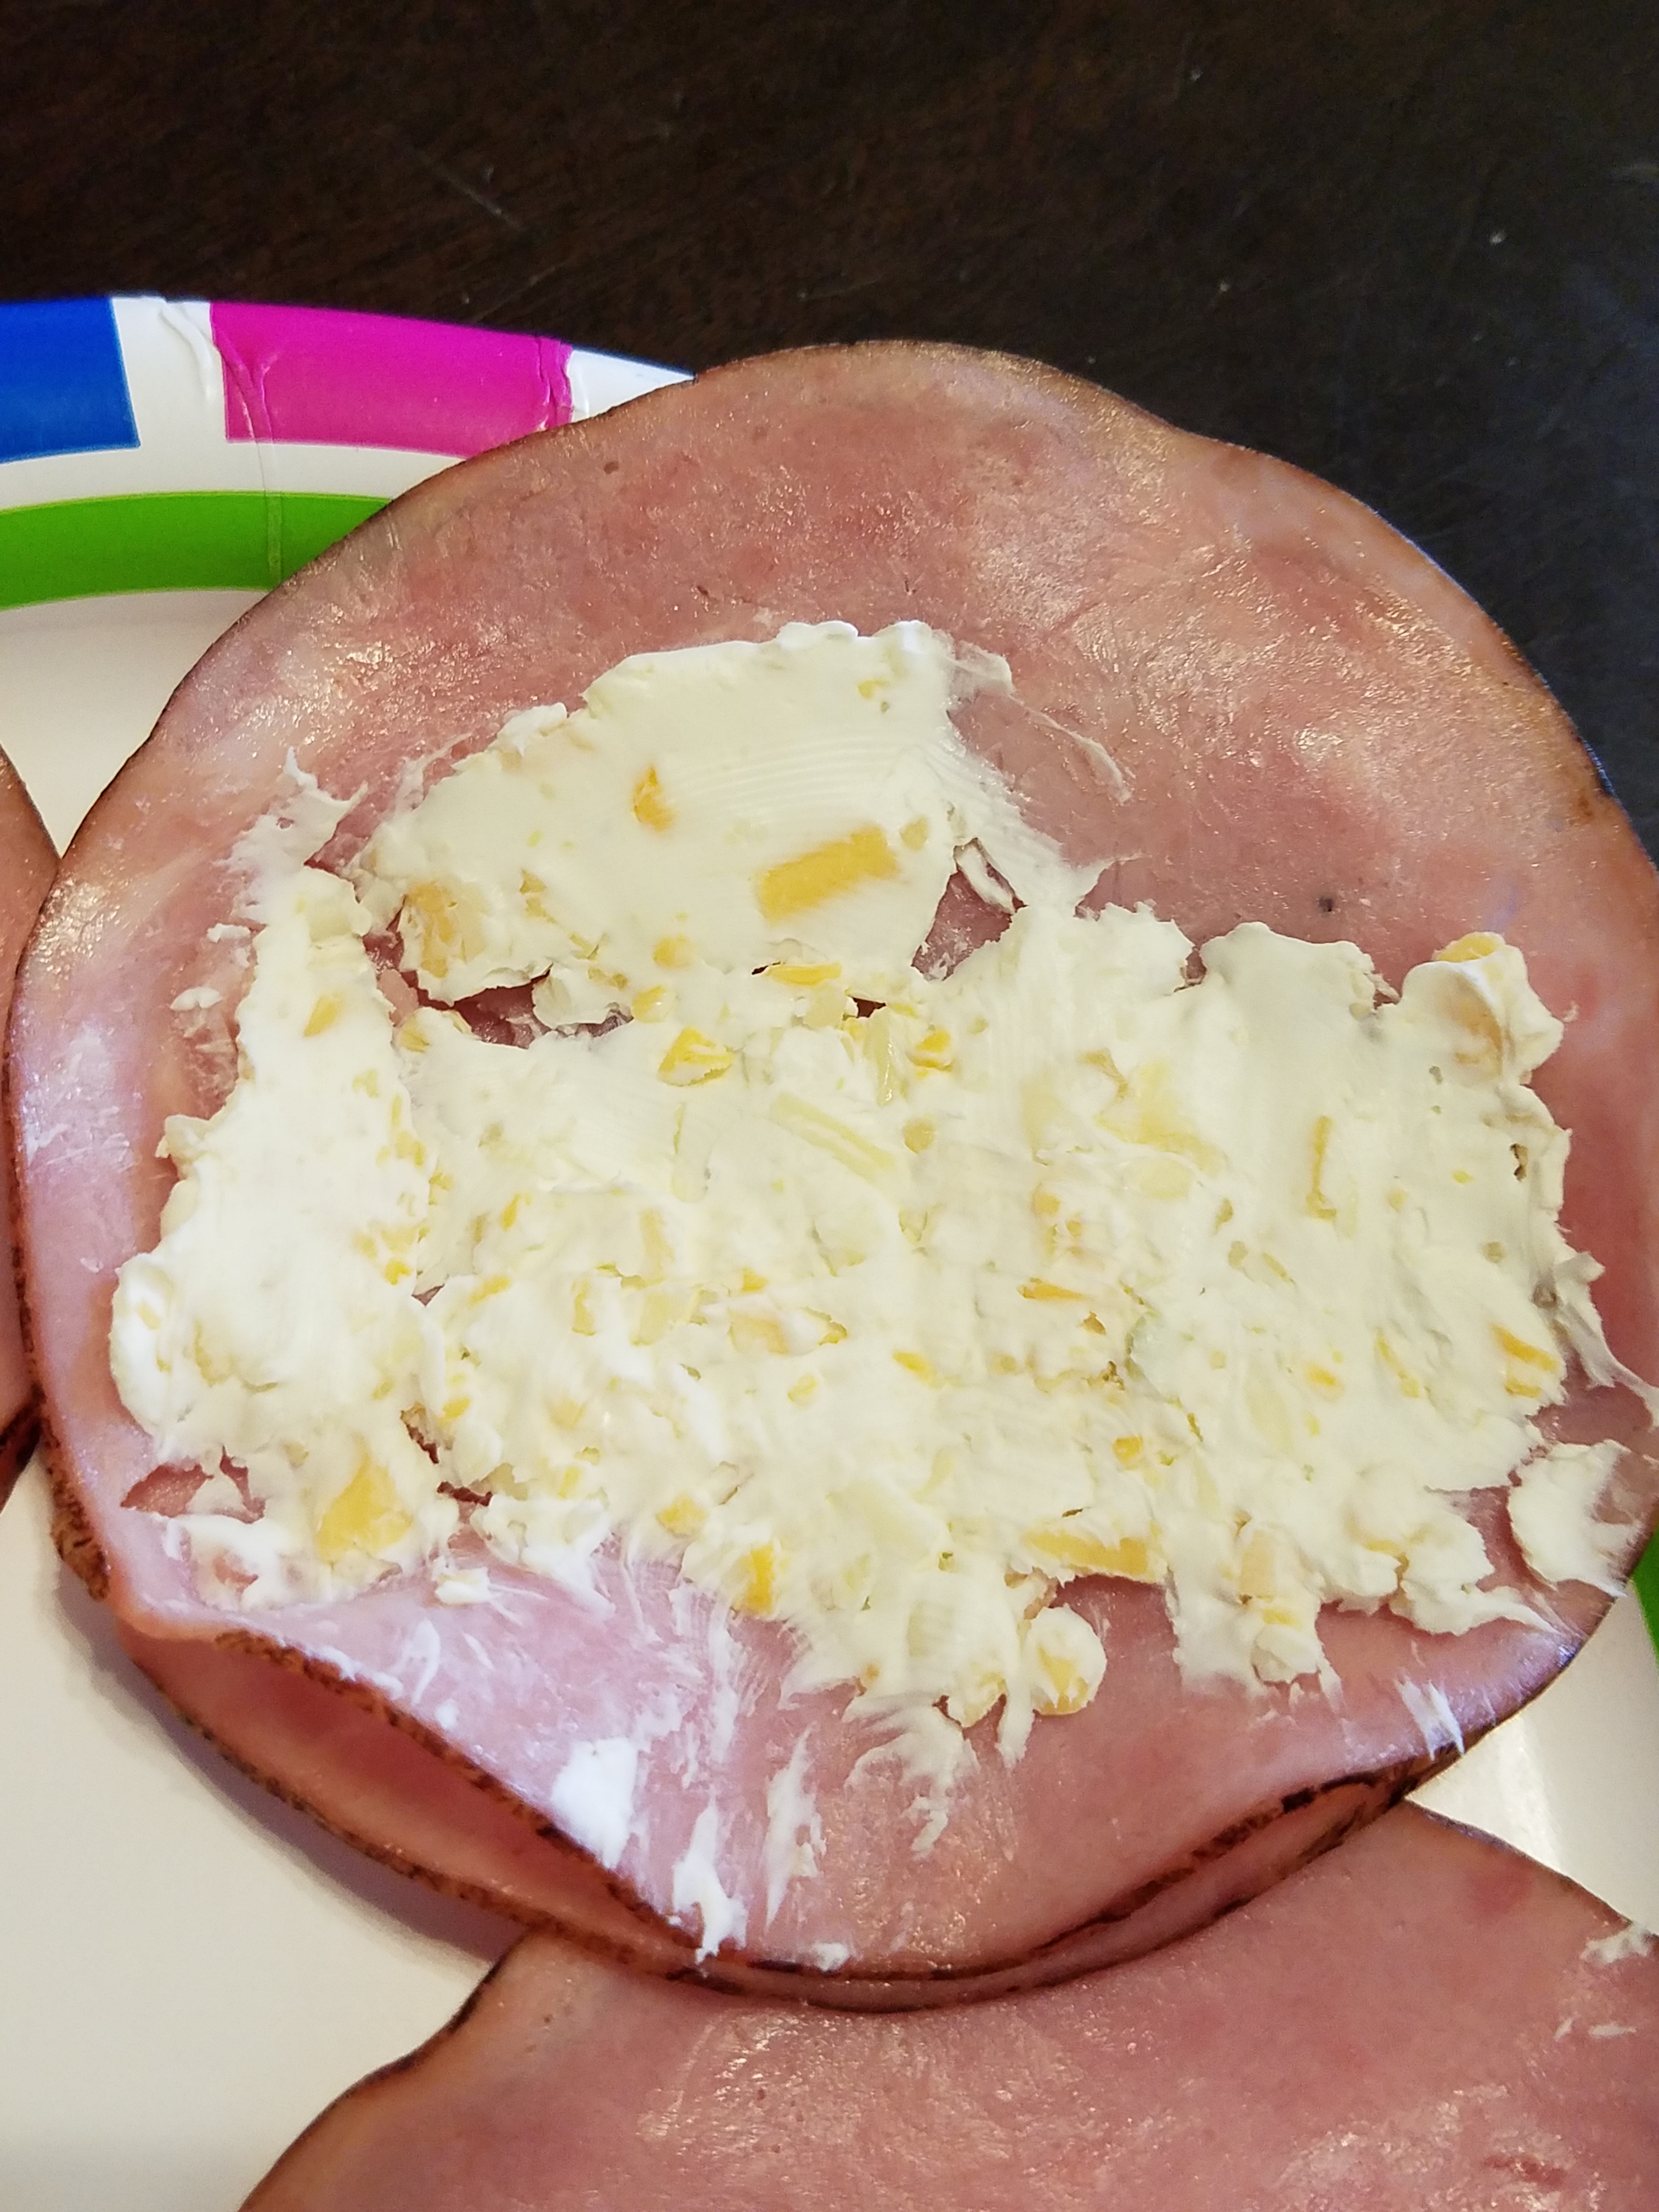
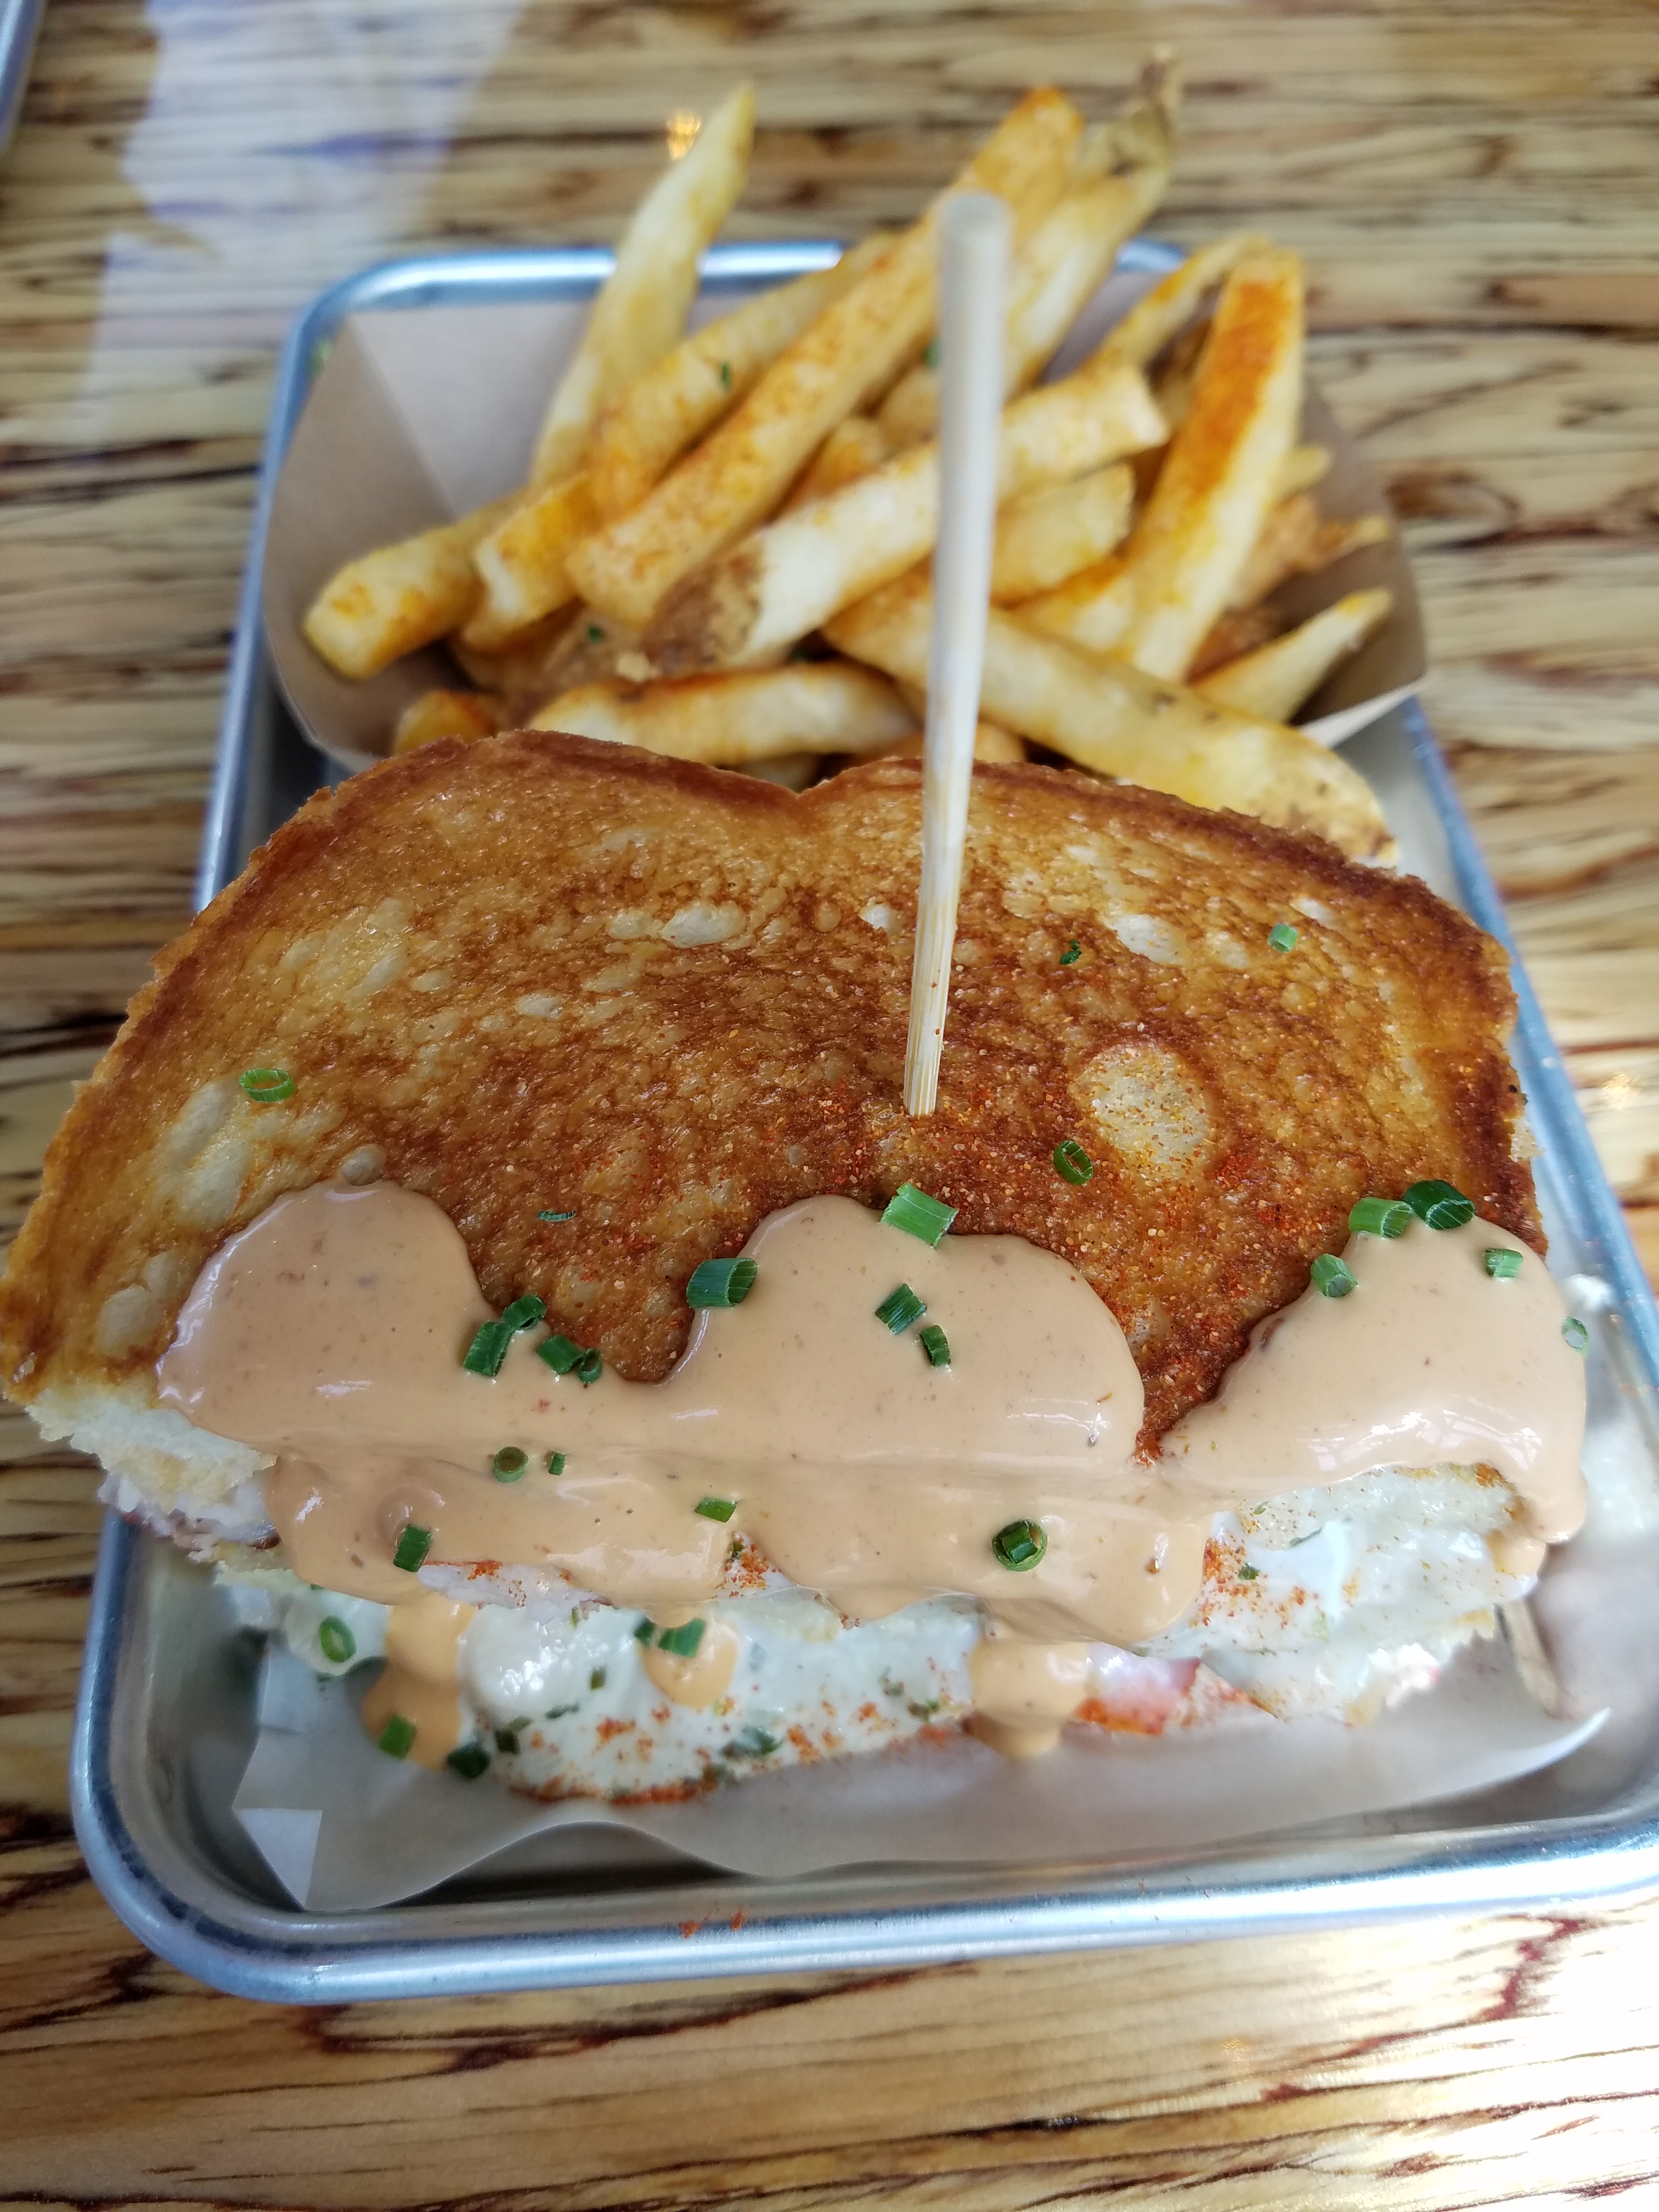 L- My fourth favorite is one of their most popular items on the menu. The Clobster Grilled Cheese. It was very tasty and reminded me of a Lobster Roll.
J – The sandwich, let me try to describe this for a second. First you have a lot of fresh tender lobster, then you add that to a grilled cheese, how can you go wrong, well maybe if you add the sauce they put on it, but remove the sauce and i think this a great sandwich. The sauce was a little too much and for me it distracted from the cheese and lobster.
S – This was my favorite dish, even though they were all amazing! It was crunchy, delicate, and flavorful. In my opinion, putting lobster on a grilled cheese sandwich is one of the best ideas ever!
M – This was my favorite grilled cheese sandwich I have ever had. again it was very light. It could have had less sauce though.
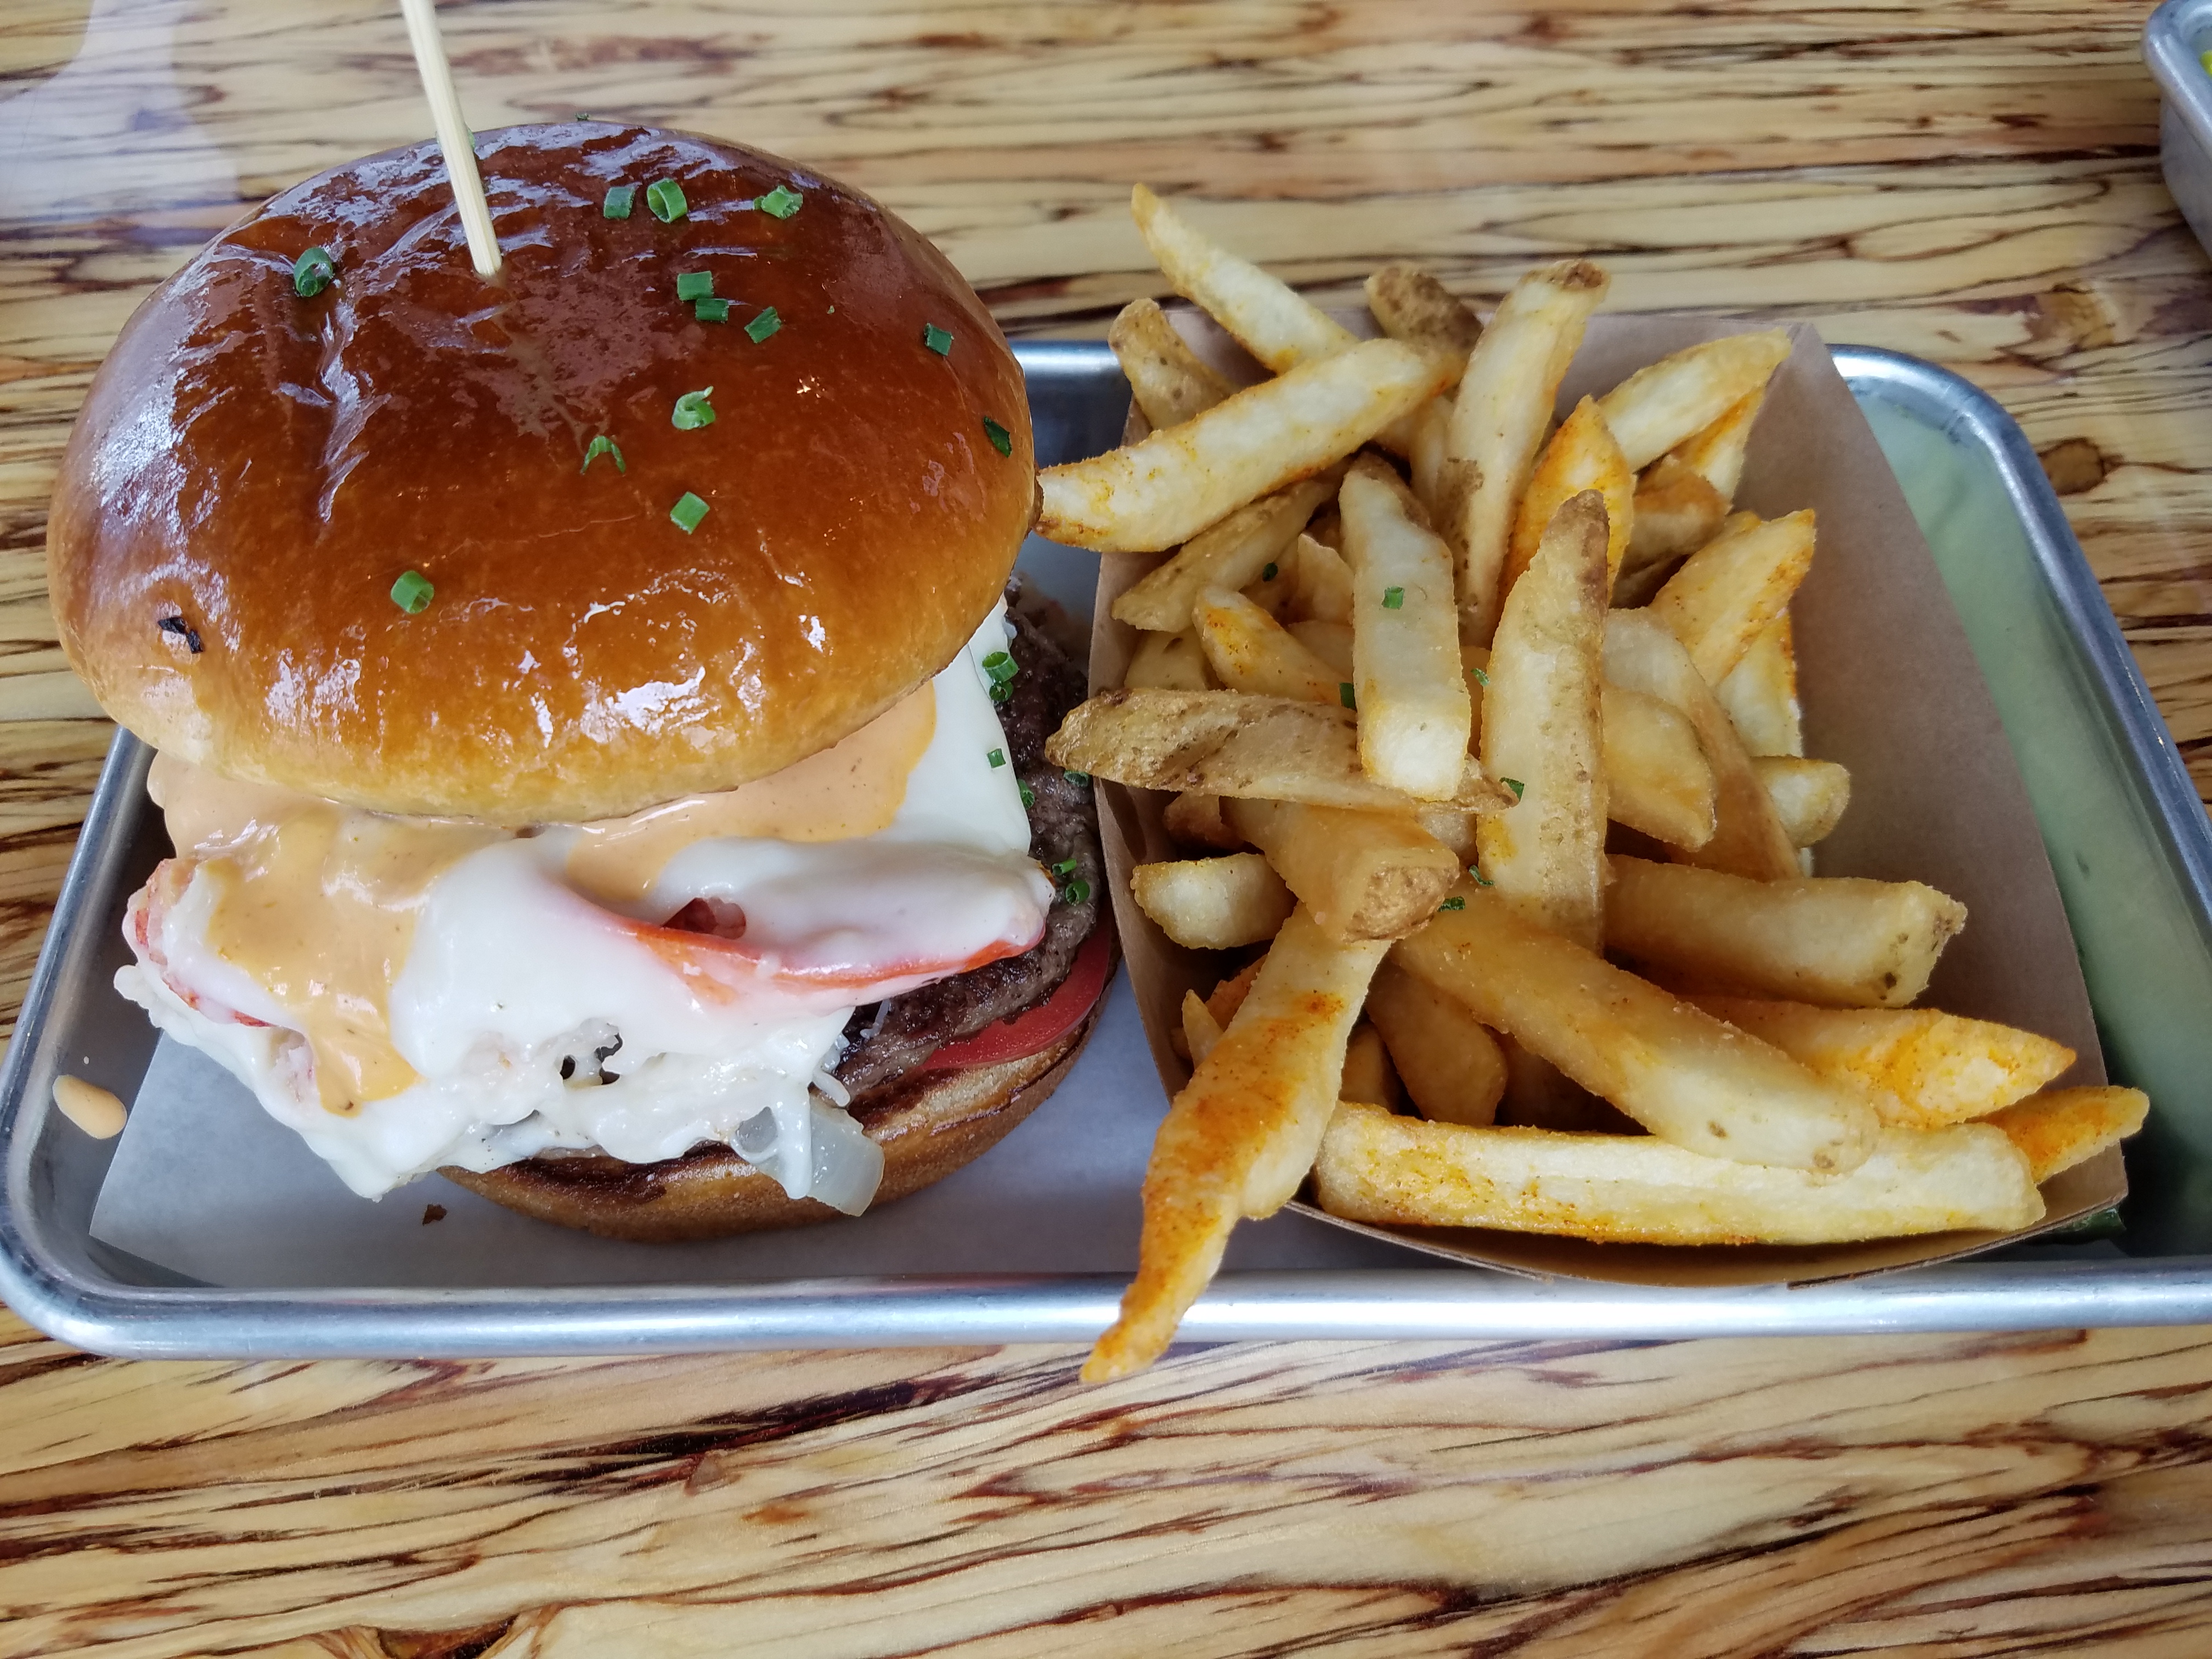 L- My least favorite was the Surf and Turf Lobster Burger. It was good, but I thought that there where too many textures and flavors. It was very messy. My favorite part of this combo was the homemade pickle spear. (not photographed) It was fresh and crisp. I don’t know that I would order this burger again.
J – This is a truly messy burger, there is a metric lobster ton of lobster on this burger, which made it really good. I LOVE a good burger, and for me it starts with the beef, the patty on this is a little weak for my taste, I would have like to see something with a stronger beef flavor, something to stand up to the strong surf.
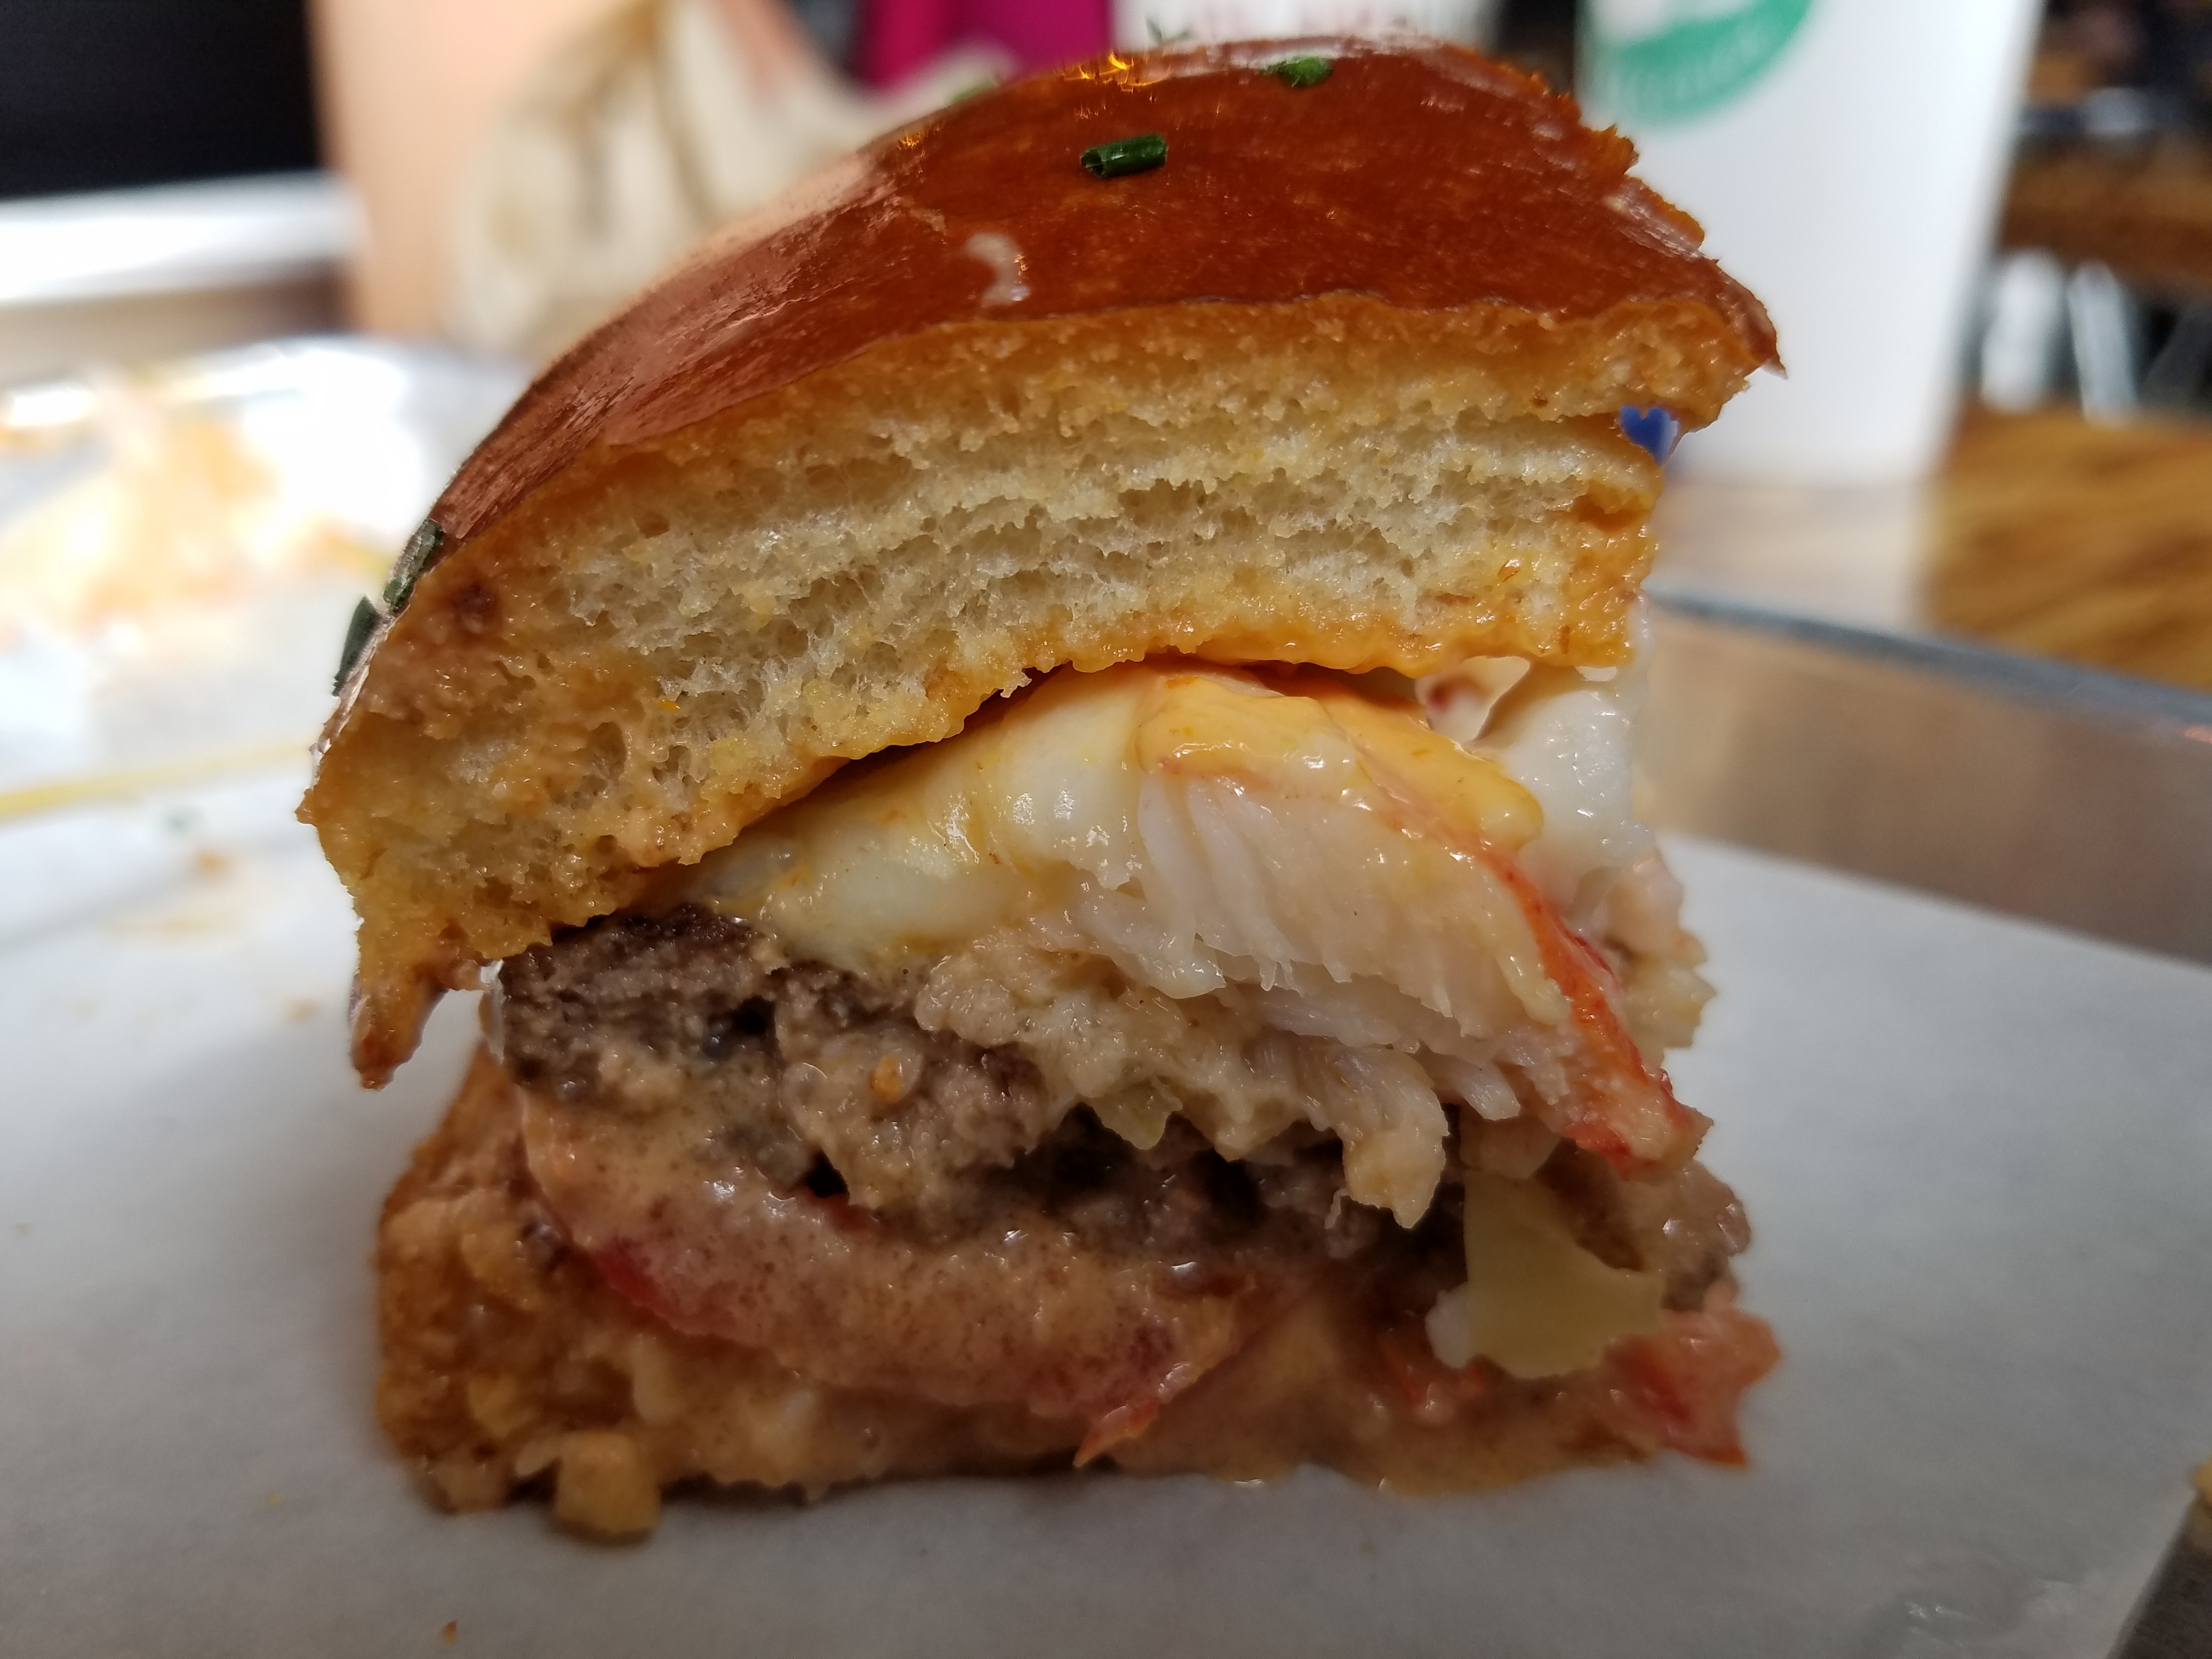 S – I love a good burger, and for me this was the perfect mix of Surf and Turf. Again the lobster is delicate and pairs nicely with the sauces inside. The beef patty I feel complimented its toppings very well. The toasted bun had a great flavor. I think they have spent the time necessary to prepare seafood properly!
M -This was my 4 favorite, there could have been more hamburger, the hamburger could have had more seasonings and less sauce.
 L- I love Malt Vinegar on my Fried Fish, but their house sauces where also tasty. I will let J review them in detail.
J – LeeAnn is the malt vinegar person in our relationship, or any vinegar for that matter. I am experimenting more with hot sauces than I ever thought I would so I tried these three on the Fish and chips. The Habanero was subtle to start out with and then came back around afterwards for a kicking party. The sriracha hot sauce was tamer than the one with the rooster on it. I think the star of this lot was the Garlic Serrento hot sauce it is milder that you would expect and plays really well with the food here.